Tuesday, November 28, 2006
Lasagna with Beschimilla sauce
Some ready made sauce in the supermarket are too acidic. So I made up my own sauce.
Improvised - Classic Lasagne recipe from Catelli
12 Catelli Lasagne Noodles
30 ml (2 Tb) olive oil
1 each onion and garlic clove, chopped
650 g (1 1/3 lb) lean ground beef or pork
1 jar (700 ml) Catelli Garden Select Chunky Pasta Sauce or Your favourite flavour
50 ml (1/4 cup) chopped fresh parsley
75 ml (1/3 cup) water
500 g (1 lb) ricotta or cottage cheese
1 packet (300 g) frozen chopped spinach, thawed and well drained (optional)
50 ml (1/4 cup) shredded mozzarella cheese or grated parmesan cheese
Fill a large pot with water and bring to a rapid boil. Add salt if desired.
Add pasta and stir until water returns to a boil
Cook stirring occasionally until desired tenderness, about 12 minutes or so.
Drain, rinse with cold water; drain well.
In a saucepan, heat oil; coom onion and garlic until tender.
Add beef; cook until browned; drain fat.
Stir in sauce, parsley and water. Simmer 1o - 15 minutes.
combine ricotta cheese with spinach.
Spread 1/4 sauce in 13" x 9" baking dish. top with 3 noodles, another 1/4 sauce and 3 more lasagne noodles.
Spread cheese mixture over noodles. Top with 3 more noodles and 1/4 sauce; cover with remaining 3 noodles and sauce. Sprinkle top with mozzarrella cheese and beschimilla sauce.
Cover and bake at 180 C (350 C) for 30 - 35 minutes.
Let stand 10 minutes before serving. Will post beschimilla sauce later.
Beef Back Rib with Pineapple
Canapes
Cream Cheese Cookies
Nutella Muffin
Roast Leg of Lamb
Jam Filled Cookies
Nonya Serunding or Pulut Panggang
BBQ Pork - Char Siew
I went to our supermarket and bought Pork Shoulder Butt with bone in cause it was on sale. I had to debone it which can be tedious for some. This is my second attempt and it turned out delicious. Good for Char Siew Pao. I bake it at 375ºF on a rack with water underneath. The last minute or so, I brush with some hoisin sauce. Yummy!
Chocolate Peppermint Leaves Brownies
Peppermint leaves I have to grind it into very fine little pieces or you could use peppermint tea or extract for this recipe.
Credited to The Best of Fine Cooking 2006
Yields: 30 brownies
These brownies only get better after a couple of days, as their texture gets fudgier and their flavor richer. (They also freeze beautifully.) Peppermint extract is available in grocery stores or by mail order.
2½ sticks unsalted butter; more for greasing the pan
10 oz unsweetened chocolate
2 tsp peppermint tea leaves (from about 2 tea bags)
2 cups sugar
4 large eggs
2 tsp peppermint extract
¼ tsp kosher salt
1 cup unbleached all purpose flour
2 oz semisweet chocolate (equivalent to 2 pieces)
2 Tbs light corn syrup
2 oz white chocolate (equivalent to 2 pieces)
Center a rack in the oven and heat the oven to 350ºF. Butter the bottom and sides of a 9 x 13 inch baking pan, line it with parchment (the paper should extend at least an inch above the long sides to act as handles for getting the brownies out), and butter the paper.
Put about 2 inches of water in a small pot and heat to a gentle simmer. In a heatproof bowl set over the water, melt 2 sticks of the butter and 8 oz of the unsweetened chocolate. Be sure that the water is hot but not boiling and that it doesn’t touch the bottom of the bowl. Stir occasionally with a heatproof spatula until the mixture is completely melted and uniform, 6 to 7 minutes. Turn off the heat, but leave the bowl over the water.
In a food processor, finely grind the peppermint leaves with the sugar. In a medium bowl whisk together the eggs, peppermint extract, salt, and peppermint sugar until just combined. Whisk in the melted chocolate mixture (reserve the pot of water for later). Slowly add the flour, gently folding it in with a spatula, until incorporated. Spread the batter into the prepared pan and bake until a pick inserted into the center comes out almost clean (a few bits of batter should cling to the pick), 35 to 40 minutes. Put the pan on a rack to cool to room temperature, about 2 hours. Lift the paper lining to pull the brownies out of the pan. Peel the paper off the brownies and put them on a cutting board.
To make the glaze, bring the pot of water back to a gentle simmer. Set a heat proof bowl over the pot and add the semi sweet chocolate, corn syrup, and the remaining 2 oz each butter and unsweetened chocolate. Stir frequently with a heatproof spatula until the mixture is melted and smooth; set aside. Put the white chocolate in a separate heatproof bowl and set it over the water. Stir frequently until it’s melted and smooth; remove it from the heat.
Spread the chocolate glaze over the cooled brownies in an even layer using a spatula. Drizzle the white chocolate over the glaze in lines (if the white chocolate clumps in places, don’t worry; it will look fine once you run the skewer through it.) Drag a think toothpick through the glazes in alternating directions to crate a marbled look. Lift the cutting board and firmly tap it on the counter to settle the glaze.
Refrigerate until the glaze is set, at least 20minutes and up to 12 hours. Cut into thirty bars, about 2 inches square (a knife rinsed in hot water and then dried will cut more cleanly than a cold knife). Keep well covered and serve at room temperature.
Cake Decorating - Butter Icing
Wednesday, November 22, 2006
Rainbow Cake
My first attempt decorating cake. It was snowing quite heavily and the road was bumpy that didn't help either it ruined my cake on the way to class. Sad to say the rest of the class were in the same boat. However everyone were enthusiatic and were looking forward and anticipating to what Lynda had up her sleeve for tonight's class.
Clown Cake
Here goes another lesson for today. It was a huge improvement from my previous rainbow cake. My husband was so proud and decided to take a picture to remember the event. lol I didn't get to finish it in class and came home to do it. My instructor Lynda had to cover quite a few new materials in class for our next project.
Tuesday, November 21, 2006
Hum Ching Pheng
I have been busy going around in circle yesterday trying to get my christmas shopping in order. After walking around this huge mall for 41/2 hours I found something for my son-in-law. I am ready to mail out the parcel to my daughter. Shopping for someone is no fun at all!
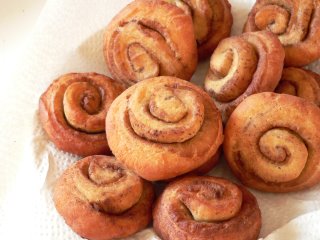
I was tired but I went ahead and tried this recipe. Thanks to Lily for her Hum Ching Pheng recipe. I didn't stuff them with red bean paste. It was delicious when you eat them the minute you take them out from the deep fryer.
Subscribe to:
Posts (Atom)